
Getting Started with Poppy Paint
Basics
- Poppy Paint
- Paint Pallete
- Cling Wrap
- High Proof Alcohol – See Below
- Shot Glass or Similar Size Cup
- Paper Towels
PREP YOUR AREA:
1. Prep your paint palette by covering it in cling wrap. I prefer Press and Seal, which sticks well to the palette. Use enough so that there is excess cling wrap hanging over each side of the palette.
Press the plastic wrap down into each reservoir, then wrap the overhanging plastic around the edges and under the bottom.
2. Fill a shot glass with approximately ¾ inch of high proof alcohol. We generally use 91% isopropyl since it is more cost efficient, but other options are 180+ proof grain alcohol (Everclear) and lemon extract. The latter two options are better since they are food safe, but they are quite a bit more expensive. Isopropyl works very well, but you’ll have an extra step of cleaning the isopropyl out of your brushes before each use. We’ll be resting our paint brushes in this alcohol for cleaning and to ensure they don’t dry out. Be careful not to overfill the glass – if your paint brush handles are submerged in the alcohol, they may become damaged. We only want the bristles and metal tip in the alcohol.
3. Set up your workspace with any tools you plan on using. We’ll be using a fine tip brush, a flat tip brush, a pointed round tip brush, circle paint daubers, a small ball-tip tool, and a stamp. We’ll also be using a small makeup sponge to apply the paint to the stamp.
Find a smooth, non-porous surface to work on. I generally use Poppy Paint on top of a silicone mat. Spills are much easier to clean on surfaces like this. Additionally, always have paper towels handy. I generally place whatever I am painting on top of a paper towel, to catch any paint mess that gets brushed over the edge.
(TIP: When looking for brushes, select those used for acrylic painting. Most brushes can be found at any arts and crafts store.)
PREPARE YOUR PAINT
1. Before using Poppy Paint, you will need to ensure it’s well-mixed. You’ll be able to see how the paint has settled on most colors, but a few (especially white and black) may appear to be well mixed even when not. For the colors in which the separation is clearly visible, shake vigorously until the color appears uniform from top to bottom. For colors like black and white where you cannot see the separation, shake even longer than the others just to be sure.
(TIP: If your paint has set for a very long time, there may be some sediment that doesn’t want to come loose from the bottom of the bottle. If this happens, gently squeezing the bottom of the bottle can help to loosen the sediment before shaking.)
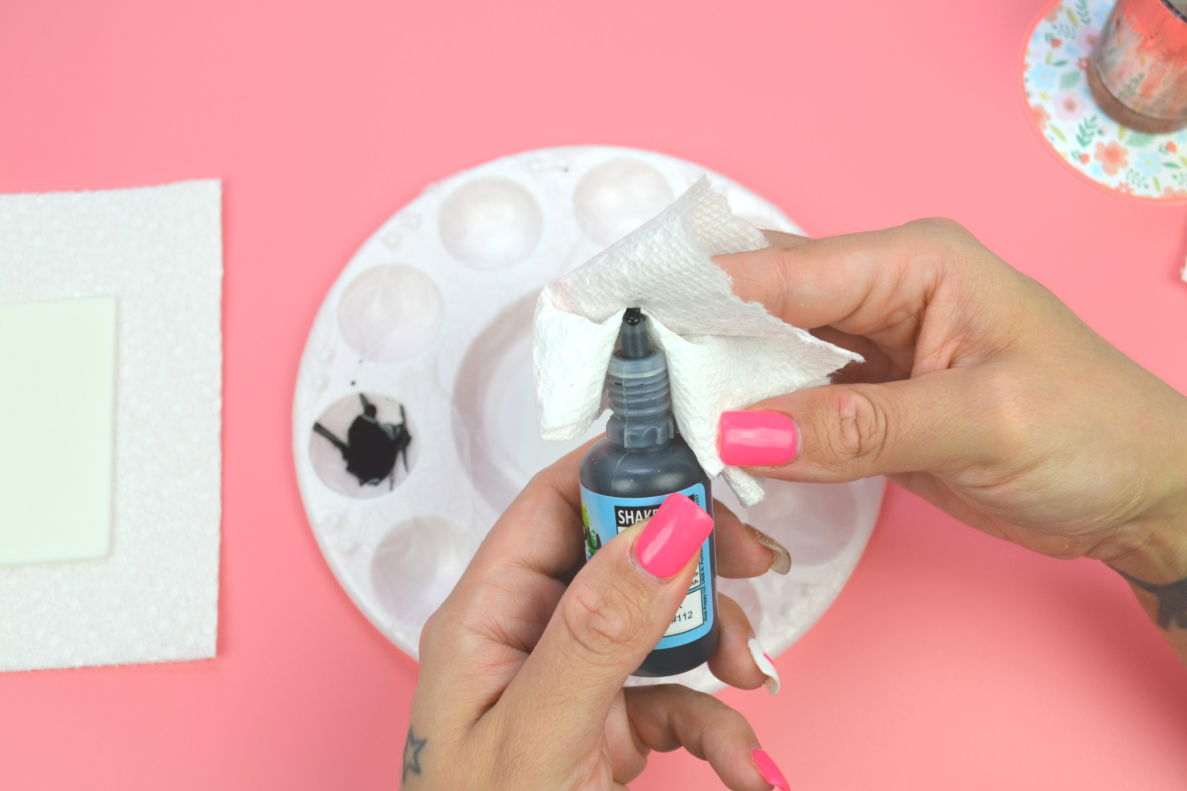
3. Wipe the paint off your bottle tip before replacing the lid so that the lid doesn’t stick when the paint dries.
- Pearlescent Poppy Paints settle much harder than standard Poppy Paints. Give the bottom of the bottle a little squeeze to loosen the color, then shake vigorously until well mixed.
- Pro tip: Store pearlescent paints horizontally so that the color settles on the side of the bottle, making it much easier to shake up.